How to create an AI agent
Step by step guide on how to create an AI agent using AgentX platform with UI.
Step 1 - Log in
Sign up at AgentX and log in to your account. We offer a free plan which does not ask for your credit card 💳!
Step 2 - Create a new AI agent
In Workspace, navigate to "+ New" and click Create Agent.

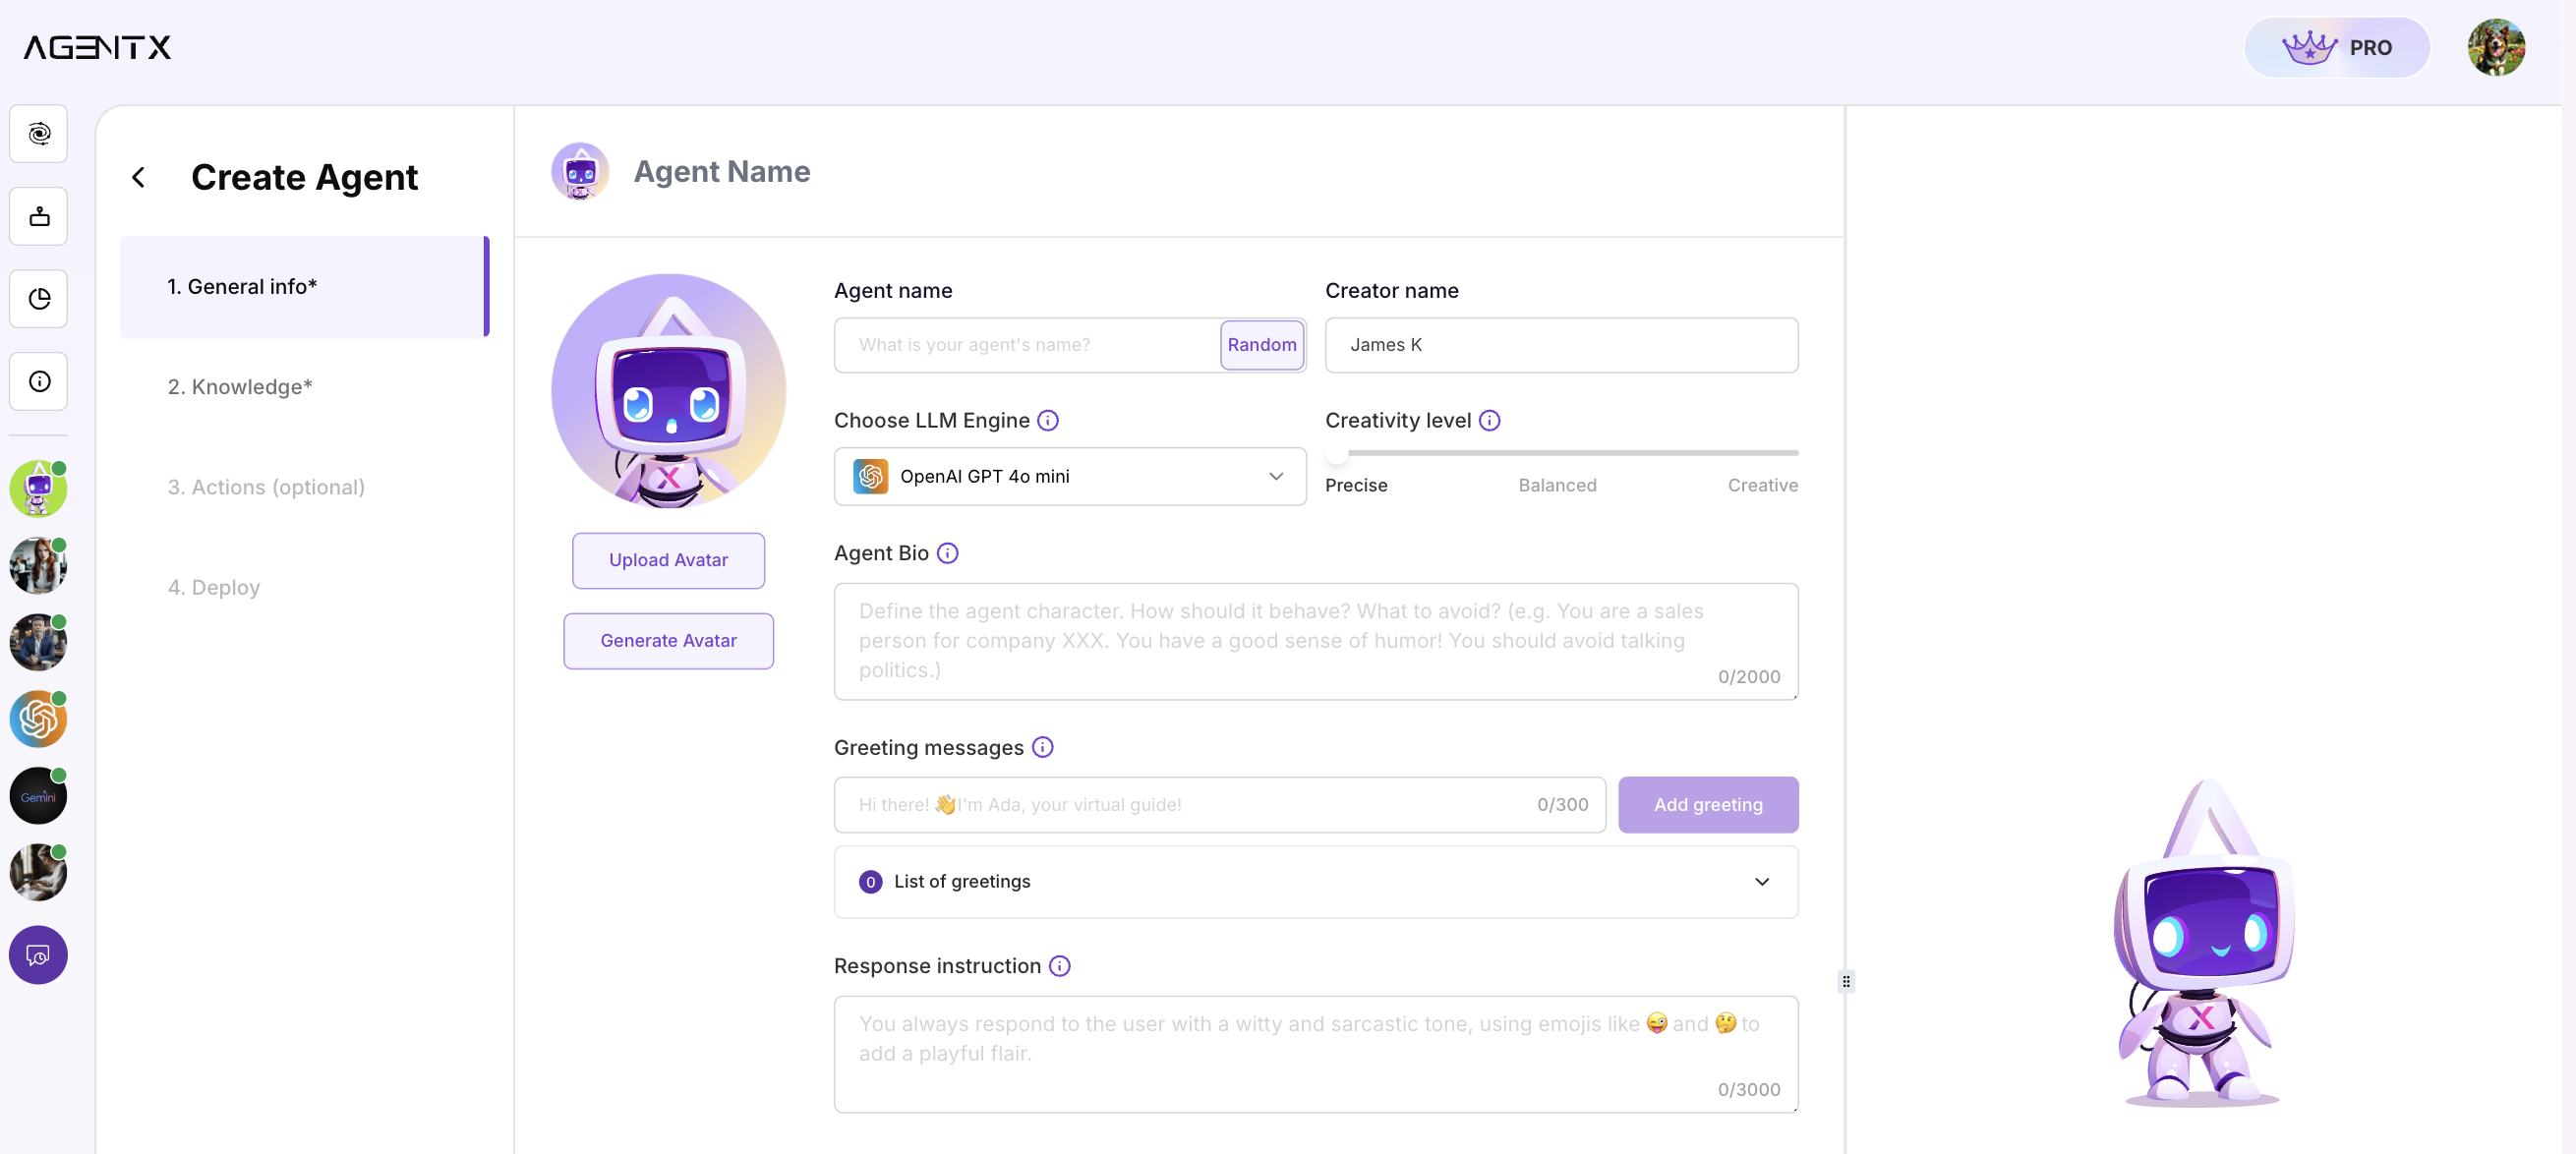
Step 3 - Setup basic Agent info
- Name: Choose a name that reflects the AI's task or a character name.
- Avatar: Select or upload an avatar that represents the AI agent.
- Creativity Level: Depends on your purpose, more creative means less control and more innovative.
- LLM Engine: AgentX allows you to choose from various engines. OpenAI GPT 4-mini is often set as the default, but options like Llama AI, Claude, or Gemini are also available.
- Agent Bio: Give prompts to your agent for more engaging experience. Think of it as introducing your bot to the world! You can also add guidelines or things your agent should do and should not do.
- Response Instruction: Tailor your Agent's responses to fit any tone or style, from professional to playful, using emojis or specific language. Set guidelines on topics to focus on or avoid, ensuring your agent aligns perfectly with your desired interaction experience.

Step 4 - Knowledge base
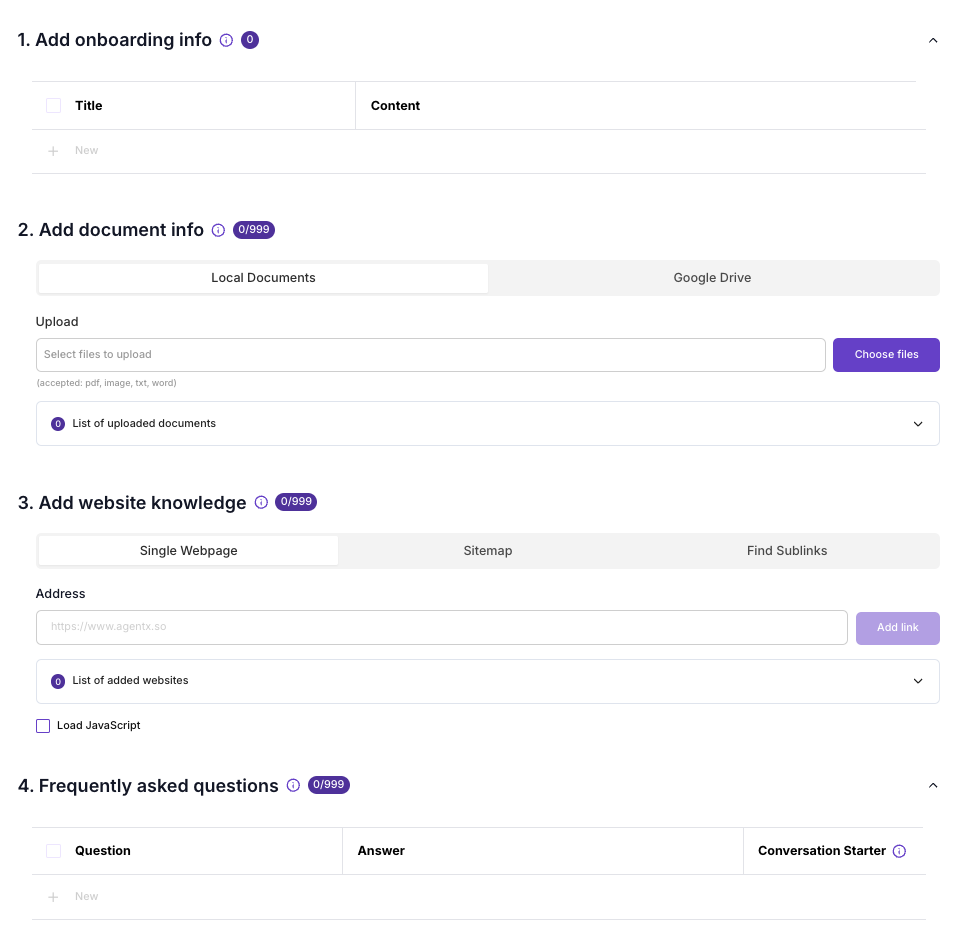
Now you can setup the knowledge base for the agent. The knowledge base is like long term memory for the AI agent, once you setup, it will always remember.

- Onboarding Info: This is for short and quick information that the agent will always remember. We recommend to use this field for short Q&A. For example -
Title: when was AgentX founded? Content: in 2024 - Document Info: This field allows you to upload document as knowledge base. You can upload through your local files or connect to Google Drive. AgentX will read and extract content from documents and automatically creating vector database for the RAG system (Retrieval Augmented Generation).
- Website knowledge: This field allows you to choose a certain website as knowledge base. AgentX will read the website content, similar like document and create vector database from the website content for the RAG system. Note the website content needs to be readable without needing to log in.
- Frequently Asked Questions: This field allows you to copy and paste or write new frequently asked questions. You can also pick one or more of the FAQs as Conversation Starter.
Step 5 - Actions

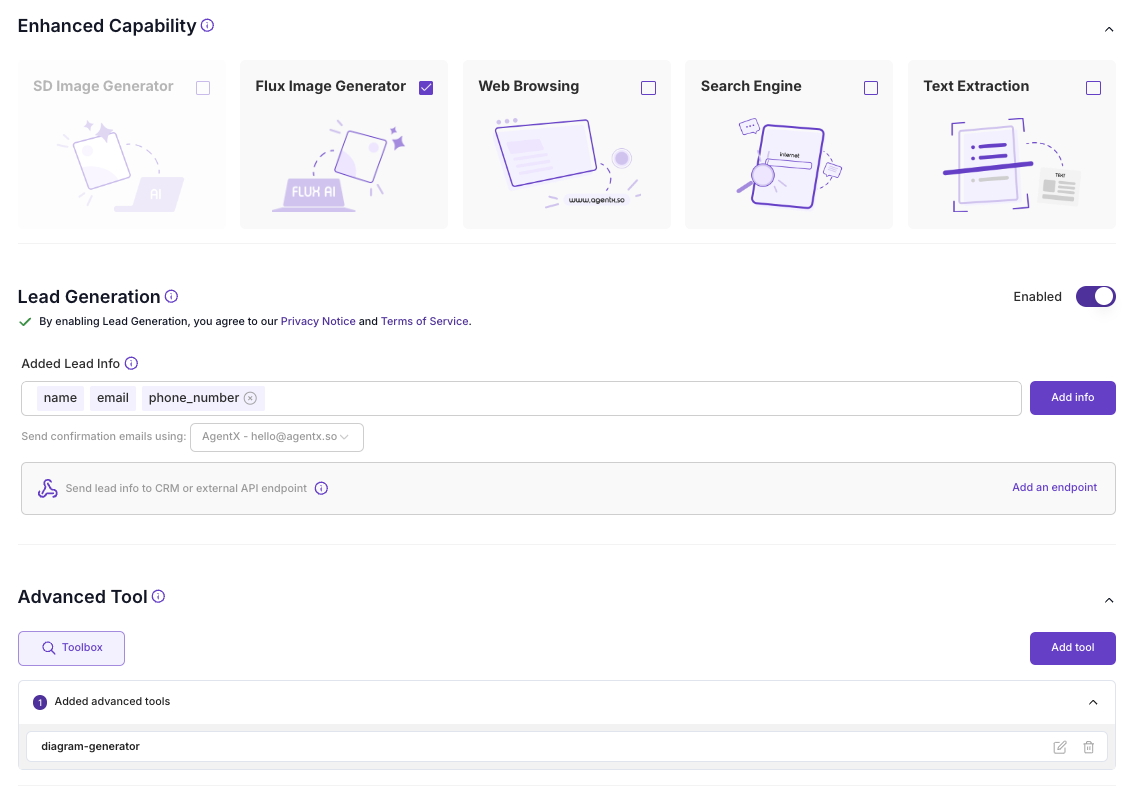
AgentX provides out-of-box action features such as
- Image generation - allow your agent to generate image (Stable Diffusion XL, or Flux)
- web browsing - allow your agent to view a website
- search engine - allow your agent to search Google for real time event
- text extraction - allow your agent to read document and extract text from PDF, images, etc.
- lead generation - allow your agent to ask for contact info while talking to the customers. You are able to customize what Lead info need to be collected and also connect to CRM.
- schedule handling - allow your agent to handle your Google calendar. (check availability, book/cancel event, schedule meetings)
If the pre-build tool does not meet your requirement, you can always use Advanced Tool to customize your own tool using Python programming language.
Step 6 - Deploy

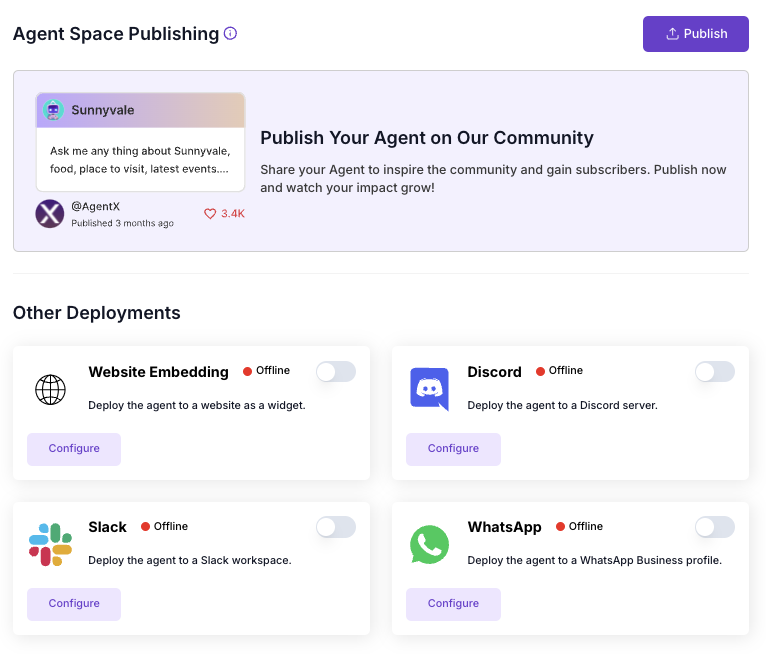
You can deploy your AI Agent to:
- Agent Space: Provided by AgentX, agent space allows everyone to share their AI agent to the community.
- Website: You can install your AI agent on to any website using Javascript snippet.
- Discord: You can deploy your agent to Discord so that people in your community can talk to it. See example.
- Slack: Deploy your agent to Slack workspace so that your teammates can talk to it as well.
- WhatsApp: Deploy your AI agent to WhatsApp business account, so that the AI can response to your customer on your behalf.
Updated about 1 year ago
